Wednesday, December 5, 2012

Snowman Freebie...

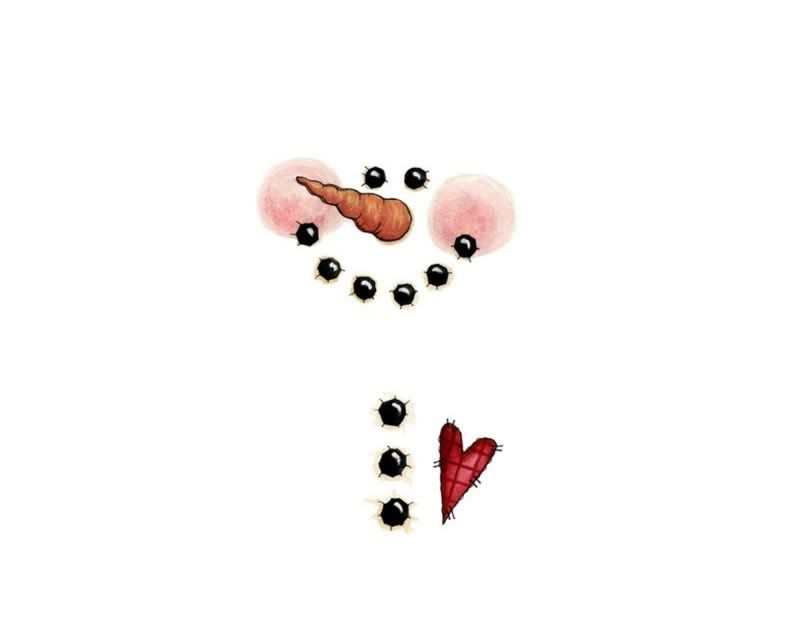
It looks like an invasion of snowmen...LOL...This little snowman is another oldie but goodie...I gave the graphic away as a freebie last year and have had several requests for it this year sooooo here he is...

First, you need to go to the following link and print out your snowman on photo or brochure paper. Make sure it is landscape and I print 2 at a time on 5" x 7"size,
then I cut them to 5 1/2" W x 6" T.
Snowman Printable

This was originally found here. She has several others on her blog as well.

This graphic may be sized to fit almost anything, from rolls of Lifesavers or Rolos to coffee cans and microwave popcorn. It works especially well when wrapped around your favorite size of Hershey bar.
The hats can be made out of felt, fleece, Christmas socks or the cutest thing I've seen is knit gloves...The scarfs can be made from scraps of fabric, felt, fleece or ribbon as well. It's also fun to add buttons, little snowflakes and other doodads to make them really fancy...

Several Hugsisters from the PcCrafter message board were kind enough to send me pictures of their snowman creations and I do appreciate their help...sorry to say that I could'nt use all the pictures but here's a sampling of what you can do with this simple piece of art...

I think these are wrapped around microwave popcorn...
love the little jingle bells!
Lifesaver snowmen are the cutest! It looks like she used the finger of some knitted gloves for the hat...and added some tiny snowflakes and yarn for the scarf...cute,cute,cute!

This is your basic Hershey bar with a felt hat...I sold a bunch of snowmen just like this last year at my craft shows...they where my best sellers!

So there you have it...my gift to you...again...now go forth and craft my friends... This lil' snowman was created to give others joy... and I hope that he will continue to make people smile for years to come...Hope you have a wonderful, joyful, Christmas season.
Hugs, Laurie
 
This is were I found them 2 years ago

Tuesday, December 4, 2012

Civil War Style Show

https://www.etsy.com/listing/112883625/civil-war-costume-plaid-long-skirt-egg

A Beautiful Plaid, perfect Skirt and Black Sash to wear for Civil War Reenacting a Dickens Christmas Event or a Holiday Hostess outfit when Entertaining!

This lovely Long Plaid Skirt is Perfect for wearing to a Civil War Reenactment, Scottish Festival, Renaissance Faire, or Victorian Costume Events. And, it's a great addition to your wardrobe for a Theater Production, School Play or Period Reenactment Event!

The Sash is 120" long x 9" wide it is a Black fabric it very pertty.

Monday, March 12, 2012

Crinkle Toy Dump Truck Patchwork Sensory Toy $22.95

Crinkle Toy Dump Truck Patchwork Sensory Toy

Dump Truck Patchwork Crinkle Toy pdf Pattern and Tutorial your are purchasing a pattern only not a finished item.

This is a great toy for children as young as 3 months old fun to make a quick and easy and great gift for a baby shower or New baby gift.

Great! learning toy that grows with your child from infant through early childhood - Excellent for hand eye cordnation. Baby safe and easy care (machine washable).
Great for baby play...holding, gripping, rolling, tossing, shaking and of course...drooling. This is a very appealing and wonderful childhood favorite!

My Grandson is 3 months old and he can already grab the tags and shake the 0wl, he also seams to like all the bright colors and the crinkling sound.

Size: 8 1/2" W, 11"H (size can very depending on fabric type).

You are purchasing a pdf pattern only not a finished item.

Care: machine wash/dry on gentle cycle, low heat.

Usually ships in 24 hours from the date that payment is received.
https://www.etsy.com/listing/227794667/crinkle-toy-dump-truck-patchwork-sensory?ref=shop_home_active_1

Monday, December 26, 2011

Pdf  Handbag  Pattern Vera Bradley look alike Olivia


Pdf Pattern
Hobo Purse $8.95
With  Free Zipper
change and Glasses Case
Vera Bradley Look
alike Pattern.


 Purchase on  www.civilwarlay.etsy.com or www.zibbet.com/AdoriesDesigns and   http://tittleandtat.com.au/shop/pdfpatternsbyadorie,
hope to see you there.
Olivia's Flower Garden Hobo Handbag $8.95 Pdf Pattern

SALE 3 pattern for 1 price Oliva's Flower Garden Hobo purse change and glasses case pdf pattern and Tutorial only.
~~~~~~~~~~~~~~~~~~~~~~~~~~~~~~~~~~~~~~~~~~~~~~~~~~~~~~~~~~~~
This is a $4.99 saving over buying them individualy,
hurry while the supplies last.
~~~~~~~~~~~~~~~~~~~~~~~~~~~~~~~~~~~~~~~~~~~~~~~~~~~~~~~~~~~~


This would make a great Christmas gift anyone of the 3
purses or cases.

You can make it really easy or it could have as many
as 7 pockets, that makes it more funtional much like a
built in wallet in your purse.

The Handbag Size:
13" Wide
13" Tall body of handbag only
10" Center of handbag body
17" Long Handle
20 1/2" From bottom of handbag to top of handle

You can make a very simple Handbag with only a couple of pockets or a more fuctional handbag with 7 pockets either only takes a afternoon to sew up.

Really neat the funitional Handbag
with a cell phone pocket
2 Large pockets
3 credit card pockets
a inside zipper pocket

This Pattern comes with:
1- Coverpage with lots of pictures and ideas.
7- Instruction pages with more that 90 pictures total
and step-by-step instruction.
6- Full size pattern pieces with seam allowance on 5 pages.
1- Supplies list with suggestions to help you.
That's a total of 14 pages and more than 60 pictures.
Easy Change Purse or Glasses case sewing beginner Tutorial pdf pattern only.

Change Purse Size:
Height: 3 1/4"
Width: 4"

Glasses Case size:
Height: 3"
Width: 6"

This is a great little change purse, small enough to use as a key chain or large enough to carry a credit card,ID and a little cash.

The pattern includes:
2-instruction pages with lots of pictures.
2-full size pattern pieces
1-supply list

This is a very easy pattern for beginners or anyone.
It only takes a few scraps to make it.
These small purses will make great Christmas gifts or any
gift.


I told you I was detailed and this helps any person of
any sewing level to make a great project.
Oh did I mention I taught craft & sewing classes for about 10 years.So I feel by giving you this much information
it's just like me being there to help you.

My Patterns are designed to print on 8 1/2"x 11"paper( Matte photo paper gives you the best pictures, and make sure you set your printer on no margins or Max size)
The pattern is on PDF file and it will come on separate attachments.I will have to send it in several emails
because most servers can't handle files this large.

COPYRIGHT INFORMATION - This is an original pattern designed, illustrated and drafted by me.
You may use this pattern to make and sell at venues such as Ebay or craft fairs, as long as you are a small (one/two person) business. Copyright for the design remains with Adorie's Designs, with all rights reserved. The actual patterns cannot be duplicated in any manner for the purpose of resale.

This sewing pattern will be sent to you by email in the PDF format. You must have Adobe Acrobat Reader installed on your computer to open and view pattern. If you do not already have it, it is available free from their website www.Adobe.com

You are purchasing a sewing pattern only - the photos are shown as examples of what can be made with this pattern. Finished Handbags are not part of this sale.

Monday, December 12, 2011

Pdf Pattern Small purse with lots of pockets


This is a Small Chic Zipper Handbag Pdf Pattern only.

You can make it really easy or it could have as many
as 15 pockets, that makes it more funtional much like a
built in wallet in your purse.

The Handbag Size:
10 1/2" Wide
6 1/2" Tall body of purse only
23" Long Handle
16" From bottom of handbag to top of handle

This Pattern easily changes to many different
styles of Handbags.

You can make a very simple Handbag with only a couple of pockets that only takes a afternoon or a couple of hours.

Or a Really neat the funitional Handbag
with a cell phone pocket
6 credit card pockets
a inside zipper pocket
a front stylish pocket with matching ribbon
It shows you how to make a strap with rings like all
the bought handbags now or a eaisier strap with no Rings.

This Pattern comes with:
1- Coverpage with lots of pictures and ideas.
9- Instruction pages with more that 90 pictures total
and step-by-step instruction.
9- Full size pattern pieces with seam allowance on 8 pages.
1- Supplies list with suggestions to help you.


That's a total of 19 pages and close to 100 pictures.

Monday, March 28, 2011

Crayon Tote Bag or Bible Cover Tutorial pdf pattern For Sale

I have several Tutorials For Sale on Etsy and Zibbet shops Please go check them out,here are some of them.

Child's Crayon Tote Bag or Bible Cover pdf pattern with Tutorial $4.99
 This is a really easy pattern, no zippers or button holes
it would also make a great gifts for your childrens friends.

This are great to take to Church, any place they need
something to keep them busy.

The small size would also be great for putting their Bible
in a notebook or drawing pad and some paper. Then they would have crayons or pencils to color in church with.

The Pattern is super easy and it only takes a couple of hours to complete.

Sizes:
Small: 9"T x 9"W with a 2" gusset across the bottom.

This Pattern comes with:
1- Coverpage with lots of pictures and ideas.
5- Instruction pages with lots of pictures and step-by-
step instruction.
Full size pattern pieces with seam allowance.
1- Supplies list with suggestions to help you.

Wednesday, February 23, 2011

Civil War Ladies Hat Free Tutorial


Ladies Civil War  Teardrop Hat  Free Tutorial

I am going to show you how to make these beautiful hats to complete any Historical outfit.Oh, buy the way you can purchase the hat forms by emailing me at adorie@att.net or at my shop http://www.civilwarladyshop.com/ . If  you want several it will be cheaper to email me and I will give you a break on shipping. 


What you will need to make your hat
1 teardrop hat form
Hot glue gun-small low temp, is fine and glue sticks
1 piece of white chalk
Fabric to cover your hat 9" x 10"piece (make sure the fabric is not see through or the hat form will show through)
Lining to match in color 9" x 10"piece (light weight is good)
4 yards Tulle 6" wide on the spool (Hobby Lobby sells it or your local florist)

4 yards of  7/8" Wide Ribbon in Satin or grosgrain 2 extra yards if you make the satin rose.
These Items all go around edge of hat:
20" of  1/2"of Braid(used for upholstery)
20" of 1 1/2" ruffled satin
30" of  1 7/8" to 2" ruffled lace or beads (optional)
Now that you have all your supplies lets begin.
I will be showing you the simplest Hat with one ruffle and braid.

Covering top of  hat
 
To make my pattern I use white chalk and draw about 1 1/2" larger all way around the hat form and the lining will be
about 1/2"  smaller then the top of the hat. (If covering more then one make you a pattern with the first one for the lining and
 the top.) Once you are finished cut on chalk line all the way around.
       
Now that you have your fabric piece cut out it is time to hot glue it to the hat form. I use a cereal bowl with a plastic bag
stuffed in it to keep from flatting the top of the hat as seen in the picture below.When hot gluing fabric to hat form,always put
glue on inside of hat form and it really doesn't take alot, you don't want to much or it will come through the fabric.  I usually glue a little in the front and in the back to position the fabric on the hat form and to keep it from moving around. Gluing the the rest of the fabric around the edge start at the front on either side that you glued. Put about one inch of glue and stretch it along the edge trying not to have wrinkles until you get to the back. You will probably want to alternate sides to keep it even. There will be a few puckers or wrinkles in the back, but the tulle and bow will cover them up.


You have your fabric glued onto your hat form and now you are ready to glue your satin
ruffle around the edge and your braid on the top edge.


You have our fabric glued onto your hat form, get your braid and you satin ruffle or whatever trim you would like.


Hot glue starting at the back the hat,you will want to flip the raw edge of the satin ruffle edge in about 1/4" so it doesn't show and glue it in place. It doesn't take a lot of glue to glue the ruffle on to the hat,you don't want to put to much glue or it will squeeze out and show on the front of the hat.  


You will only want to hot glue about 2" at a time and be really careful not to get it on the ruffle(if you do get glue on your ruffle use a hot iron and that will usually get most of it off.


When you get to the back you will want to do the same as you
did  when you started and make sure all raw edge are turned in
and hot glue the two sides together making them meet. As seen
in the picture below.  


Putting braid onto the top of your hat 

Turn your bowl upside down and put your hat on there, it
will give you something to work on. When hot gluing the braid
on you just need a small amount of hot glue or it will squash out
rough the braid that is not pretty. You will start at the back same the ruffle.


As you can see in the picture you just hot glue about 2" at a time
and glue alway around and when you get to the back, overlap and make sure the end is all glued down good so it won't fray.

If you have any glue showing from when you glued the ruffle on this is a perfect time to cover it. I usually glue the braid about half on the hat and half on the ruffle to make sure the edge of the hat is not showing.  


The upper side if your hat is finished and
 this is what it should look like.


Putting Ribbon on and Lining inside the hat
 We are ready to put our ribbon on the hat.
1. Turn the hat over so you see the white mesh.
2. Cut your ribbon to the length of  46" and cut ends at a angle.
3. Get a ruler and measure about 3 3/4" from the very tip of the point on the 
    hat to the side. (you can pin your ribbon on and see how you like where the
    ribbon is poisoned, remember they wore the hat, way down on their
       foreheads and it is best that it angles back and tied under the hair).


 3. Fold ribbon in half and put a small amount of hot glue in  
     center the,just enough to hold it in place.

4.Put hot glue on the sides as seen in the picture and smooth
    ribbon up in place.  Finished it should look like the picture
    below.
Putting lining in Hat  

First you will need to clip edges alway around about 1/2" in then press the edge under about 5/8"  alway around.

 Now that your lining piece is pressed flat.
 Put a small amount of hot glue at the back and the front tip
 so it will be centered.

Then you will begin hot gluing from the front to the back, you will
have to put small tucks as you go to ease the fabric in as seen in the picture below of the finished inside hat. Now repeat the same step on the other side.


YEAH! The body of your hat is finished!
Now all we need to do is make your bow and put it on .

Making Bow for Hat
  

1.To start measure off 12" of tulle for tail.  Make two loops
 measuing a total of five  inches. make sure to twist the tulle or  ribbon
 on each loop and hold it  tight between your thumb and pointer finger.


You will need your Tulle, ribbon, ruler and sissors.


I am going to give you step by step instructions on making
a bow with tulle.


2. Do two more loops for a total of four loops.
 
3. Now do four ribbon loops making sure that the shinny side is out
right on top of the four tulle loops you already made.

4. Add six more tulle loops on top of the ribbon loops, these loop should be a little shorter.


5. Add six more ribbon loops,these should be a little shorter also, don't forget to twist every time.


6. Add one more small center ribbon loop around your thumb.


7. Here you will want to add your two more ribbon tail so you will need to cut a
piece of ribbon 24" long and place it in the center, 12" on each side of the
center. Also you will want to cut a piece of tulle 24" long and you
will put it through the center loop and tie the whole bow together with it
knot it on the back.Your bow is all finished now all you have to do is fluff it up. 
  
8.Take the tulle loops and spread them apart and fix your ribbon so it all looks even.
  

This is what your finished Bow should look like.


Now you will hot glue your bow to the hat, you only need about the size of a quarter.  


Yeah! You are finished, get ready for the ball.
If you would like to learn how to make the ribbon rose it will be on a separate post. 
If you have any questions please contact me.


Whatever you do, work at it with all your heart, as working
for the Lord,not for men.                      Colossians3:23